Macro photography allows photographers to capture intricate details that often go unnoticed by the naked eye. Mastering the art of macro photography requires understanding essential techniques and equipment to reveal the stunning beauty of small subjects. By focusing on composition, lighting, and the right tools, he or she can elevate their work to new levels.
To begin, knowledge of photography techniques such as depth of field and focus stacking is crucial. These methods help create sharp images that highlight fine textures and patterns found in nature. Choosing the right lens and camera settings can significantly impact the final result, making technical proficiency a key aspect of macro photography.
Embracing patience and practice, photographers can learn to see their surroundings from a different perspective, uncovering a hidden world teeming with detail. Whether exploring the delicate structure of a flower or the fascinating patterns of an insect, mastering macro photography transforms ordinary scenes into extraordinary images.
Understanding Macro Photography
Macro photography is a specialised genre that focuses on capturing small subjects in exquisite detail. It requires specific techniques, equipment, and an understanding of magnification and working distance.
Basics of Macro Photography
Macro photography involves taking close-up images of small subjects, such as insects, flowers, or intricate textures. The primary goal is to reveal details that the naked eye might miss.
To achieve this, photographers often use various techniques, such as careful composition and controlling depth of field. Lighting is also critical; often, natural light works best, but additional lighting may be required to avoid harsh shadows. In this genre, patience is essential. Subjects may not sit still, and capturing the perfect moment can take considerable time and effort.
Macro Lenses and Extension Tubes
Macro lenses are specifically designed for close-up photography. They offer a high level of detail and are available in various focal lengths. Common options include 50mm, 100mm, and 150mm. These lenses can achieve 1:1 magnification, allowing subjects to appear life-size on the sensor.
Extension tubes, on the other hand, are used to convert standard lenses into macro lenses. By placing them between the camera body and the lens, they reduce the minimum focus distance, enabling closer shots. Best results are typically achieved with dedicated macro lenses, but extension tubes can be a cost-effective alternative for enthusiasts.
Magnification and 1:1 Magnification
Magnification describes how much larger the subject appears in the photograph compared to its actual size. It is crucial in macro photography to achieve striking images. 1:1 magnification means that the subject size on the camera’s sensor equals the subject’s real-world size. For example, if a 2 cm beetle appears as 2 cm on the sensor, the lens achieves 1:1 magnification.
Lenses providing higher magnification levels, such as 2:1 or 5:1, can produce even more detailed images. When selecting a lens, consider the intended use. For general macro work, 1:1 is typically sufficient, but serious enthusiasts may prefer specialised lenses for greater magnification.
Working Distance
Working distance is the space between the lens and the subject when the camera is focused at its closest point. It varies depending on the lens used. For macro photography, working distance is crucial. A longer working distance allows photographers to capture images without disturbing their subjects or introducing unwanted shadows.
Most dedicated macro lenses provide adequate working distances, typically ranging from a few centimetres to over 30 cm. Lenses with a longer focal length often have increased working distance, making them ideal for photographing skittish subjects like insects. Selecting the appropriate lens based on the desired working distance ensures better results and greater creative possibilities in macro photography.
Technical Aspects and Equipment
Mastering macro photography requires an understanding of critical technical elements and appropriate equipment. Focusing on camera settings, depth of field, and the right gear is essential for achieving stunning close-up images.
Camera Settings for Macro Photography
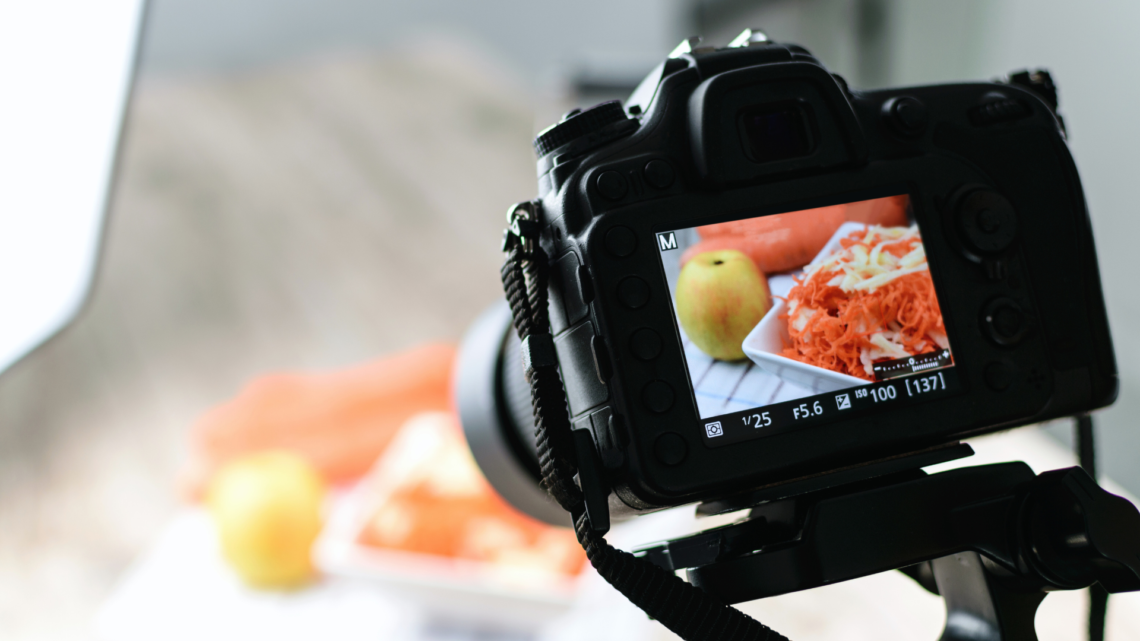
Optimal camera settings play a significant role in capturing detailed macro images. Aperture, shutter speed, and ISO must be adjusted thoughtfully. Using manual focus can provide better control over sharpness and detail. This is important in macro photography, where even slight adjustments can significantly impact the image quality.
When shooting in manual mode, photographers should start by setting a low ISO to minimise noise while ensuring that enough light reaches the sensor. The right balance will depend on light conditions and desired effects.
Aperture and Depth of Field
Aperture directly influences the depth of field (DoF), essential in macro photography. A smaller aperture (like f/16 or f/22) increases DoF, keeping more of the image in focus. Conversely, a wider aperture (such as f/2.8 or f/4) creates a shallower DoF, drawing attention to the subject against a blurred background. This technique can enhance artistic effects.
Photographers should consider focus stacking when dealing with limited DoF. This technique involves taking multiple shots at different focus points to combine them into a single, sharply focused image in post-processing.
Shutter Speed and ISO
Shutter speed is crucial in macro photography, especially when capturing moving subjects. A faster shutter speed, typically at least 1/250s, helps freeze motion and reduce blur.
In lower light conditions, increasing the ISO might be needed. However, careful consideration is necessary; higher ISO settings can introduce noise that detracts from image quality. Practising with various shutter speeds and ISO combinations will help photographers find effective settings for different scenarios, balancing exposure and clarity.
Choosing the Right Equipment
Selecting appropriate equipment is vital for successful macro photography. A dedicated macro lens, ranging from 50mm to 100mm, offers significant magnification and optimal image quality. When deciding between a DSLR and a mirrorless camera, both have advantages. Full-frame sensors provide larger image quality, while crop sensors might benefit the depth of field in close-up shots. Sturdy tripods are also essential. They stabilise the camera, allowing for extended exposures without a camera shake.
Tripod for Stability and Focusing Aids
Using a tripod is highly recommended, especially for static subjects. A sturdy tripod enhances stability and allows adjustments for precise framing.
Many tripods come with a macro focusing rail, which enables fine-tuning of the image composition without moving the entire setup. This is especially useful when working with shallow depth-of-field scenarios. Additionally, using a remote shutter release can help prevent any camera shake during exposures, ensuring the sharpest images possible.
Natural Light vs Artificial Light
Light quality impacts macro photography significantly. Natural light is often preferred for capturing accurate colours and subtle details. Shooting during the golden hour can provide soft, diffused light-enhancing textures.
If natural light is insufficient, artificial lighting options such as ring lights or LED panels can be employed. These tools allow photographers to control the lighting environment, reducing harsh shadows and illuminating small subjects efficiently. Balancing natural and artificial illumination techniques can yield impressive results, helping to achieve the desired mood and clarity in macro photography.
Composition and Shooting Techniques
In macro photography, effective composition and shooting techniques play a pivotal role in capturing intricate details. This section explores practical tips that enhance focus, angles, and methods to achieve the desired clarity and impact of the images.
Composition Tips and Techniques
Successful macro photography often hinges on composition. To ensure a captivating image, photographers should consider the Rule of Thirds. Placing the subject off-centre can create balance and draw the viewer’s eye.
Textures and patterns in the subject matter should not be overlooked. Including these elements provides depth and interest. Using a shallow depth of field can also isolate the subject from the background, emphasising details. Adding reflectors or diffusers can help direct light and soften shadows, enhancing the overall composition.
Focus Techniques and Achieving Clarity
Achieving clarity in macro images is essential. Focus peaking is a valuable technique that helps identify areas of sharpness on electronic viewfinders. This feature allows photographers to visually confirm focus points on intricate subjects.
Using manual focus can provide better control over sharpness, especially with small subjects. Employing a focus stacking technique can also maximise depth of field. This method involves taking multiple images at varying focus points and combining them in post-processing for a more detailed final image.
Angles, Perspectives, and Background Considerations
Angles and perspectives significantly influence the outcome of macro photographs. Shooting from lower angles can create a more intimate feel and uniquely showcase the subject. Exploring various perspectives helps in discovering captivating views that highlight specific attributes of the subject.
Background considerations are crucial; a cluttered background can distract from the subject. Using a blurred background enhances distinction. Photographers can achieve this by ensuring sufficient distance between the subject and background or employing a wider aperture to create effective background blur.
Handheld Macro Photography vs Tripod Use
Both handheld and tripod methods have their distinct advantages in macro photography. Handheld photography allows for flexibility and quick adjustments, making it suitable for capturing moving subjects. However, steady hands and a good understanding of shutter speeds are essential to avoid motion blur.
Using a tripod provides stability, which is advantageous for achieving precise focus, especially with intricate details. It allows for longer exposure times and can be particularly useful in low-light conditions. Ultimately, the choice between handheld and tripod use depends on the photographer’s style and the specific shooting environment.
Post-Processing and Advancing Your Skills
Post-processing plays a critical role in macro photography, enhancing images and revealing intricate details. Mastering editing techniques can elevate a photographer’s work, helping to bring out the best in their subjects. Each aspect of editing, from sharpening to cropping, merits attention and practice.
Sharpening and Noise Reduction
Sharpening is essential in macro photography to enhance the fine details of subjects like insects and flowers. Tools in software like Adobe Lightroom or Photoshop allow for precise control over sharpening. Photographers should focus on the Amount, Radius, and Detail sliders to achieve the desired effect without introducing artefacts.
Noise reduction complements sharpening by eliminating unwanted grain, especially in images taken with higher ISO settings. It helps maintain clarity while smoothing out inconsistencies. Using both techniques in moderation ensures that the image remains natural and true to the subject.
Cropping and Composition Adjustments
Cropping is crucial in macro photography, allowing for tighter framing that emphasises the subject. Photographers should consider the rule of thirds or the golden ratio to create a balanced composition. Adjusting the crop can also eliminate distractions in the background, focusing attention on intricate details.
Additionally, composition adjustments may involve straightening the image or altering the aspect ratio for specific platforms. Careful consideration of leading lines and symmetry can further enhance visual appeal. Each adjustment should serve to guide the viewer’s eye directly to the subject.
Macro Photography Editing Techniques
Editing techniques specific to macro photography can significantly impact the presentation of an image. Techniques like luminosity masking allow photographers to adjust highlights and shadows without affecting mid-tones, preserving fine detail in delicate subjects.
Using layers and masks provides flexibility, enabling targeted adjustments to specific areas. For example, one could enhance the vibrancy of colours in the subject while keeping the background muted. This delicate balance draws attention where it is most desired.
Continued Practice and Patience
Advancing skills in macro photography requires ongoing practice and patience. Regularly experimenting with different techniques and settings leads to improved results. Artists should set aside time to explore new subjects and refine their eye for detail.
Patience is vital in capturing the perfect shot, especially when working with living subjects that may not cooperate. Persistence allows photographers to learn from each experience, gradually developing their unique style. Embracing the learning process fosters both creativity and improvement in their craft.