Creating traditional papier-mâché involves layering strips of paper soaked in a simple adhesive mixture onto a mould or frame. This craft method is accessible and uses basic materials like newspaper and glue or flour paste.
The key to successful papier-mâché is preparing a smooth paste and applying multiple layers to build a sturdy structure. Once dried, the piece can be painted or decorated as desired.
This step-by-step guide breaks down the process clearly, enabling anyone to master the technique and create durable papier-mâché art with ease.
Essential Materials and Preparation
This part outlines the key components needed for a successful papier-mâché project. It covers the types of paper best suited for the craft, the adhesives commonly used, and how to arrange a functional workspace for efficiency and cleanliness.
Choosing the Right Paper
Choosing suitable paper is vital for papier-mâché durability and smoothness. Newspaper is the most popular choice due to its flexibility and porosity, which helps it absorb adhesives well. Avoid glossy or heavily inked papers, as these can prevent proper adhesion and affect drying time.
Tissue paper and plain printer paper are good options when a finer finish is needed. Tearing paper into strips, rather than cutting, helps to maintain fibres for stronger layers.
Some crafters mix different papers for varying textures. Each layer thickness can influence drying speed and final strength, so paper selection should match the intended project.
Selecting and Mixing Adhesives
A strong, reliable adhesive is crucial. PVA glue is often preferred for its ease of use and strong bonding qualities. It can be diluted with water to create a papier-mâché paste with the right consistency.
Traditional paper mache paste is also simple to make at home. It typically consists of flour and water mixed into a smooth, paste-like consistency. It is less adhesive than PVA glue but more natural and economical.
When mixing adhesives, the consistency should be thick enough to coat the paper but not so thick that it clumps. A ratio of one part glue to one part water is standard. For flour paste, a common recipe is one cup of flour to about two cups of water.
Setting Up Your Workspace
A well-prepared workspace helps maintain order and speeds up the crafting process. Cover tables with plastic sheets or old newspapers to protect surfaces from glue spills.
Arrange materials—paper, adhesive, brushes, and containers—in easy reach. Use a shallow bowl or tray for dipping paper strips to avoid a mess.
Good ventilation is important, especially when using PVA glue, to prevent fumes from building up. Keep water and cloths handy for quick cleaning.
Clear space for drying finished pieces, preferably elevated and away from direct sunlight, which can cause cracking. Proper lighting aids in seeing details during layering.
Traditional Papier-Mâché Methods: Step-by-Step Process
Creating traditional papier-mâché requires preparing the right paste, choosing suitable forms, applying multiple layers, and finishing with care to ensure durability. Each step demands attention to detail and correct timing to build a strong, smooth object.
Preparing the Papier-Mâché Paste
The most common traditional papier-mâché paste consists of flour and water. To make it, mix 1 part plain flour with 2 parts water in a saucepan. Stir constantly over low heat until it thickens into a glue-like consistency without lumps.
Alternatively, PVA glue can be used diluted with water (50/50 ratio) for a stronger, faster-drying paste. Both types soften paper fibres, helping strips adhere well.
It is important to let the paste cool completely before use. This prevents paper from curling or tearing during application. The paste should be smooth and slightly sticky for the best results.
Working With Moulds and Forms
Moulds provide structure to papier-mâché projects. Common forms include balloons, cardboard shapes, or wireframes. Before applying paper strips, lightly grease or cover the form with plastic wrap to aid removal later.
Tear strips of newspaper or other scrap paper into manageable sizes (2–4 cm wide). Larger pieces are easier for flat areas; smaller pieces suit curves.
Dip each strip briefly into the paste, removing excess paste by running the strip between fingers. Over-saturated strips cause long drying times and warping.
Applying in thin, even layers reduces drying problems and creates a more uniform surface.
Layering and Drying Techniques
Start by covering the form with a base layer of paper strips, all oriented in the same direction. Let this dry in a warm, ventilated space for several hours or until completely firm.
Subsequent layers should be applied perpendicular to the previous layer’s grain. This cross-lamination increases strength and reduces cracking.
A typical project requires at least 3 to 4 layers for a durable shell. Each layer must dry fully; rushing may cause bubbles or weak spots.
Flipping or rotating the piece during drying ensures consistent moisture evaporation and prevents warping.
Removing and Sealing the Finished Piece
Once fully dry, gently remove the papier-mâché from the mould or release the balloon inside. This should be done slowly to avoid cracking.
If the form was not greased, carefully slice seams with a craft knife, then reassemble with adhesive.
Seal the finished piece using a layer of PVA glue or acrylic varnish. This protects from moisture and enhances durability.
Painting can be done after sealing, allowing customised decoration and added protection.
Creative Sculpting Techniques and Applications
This section explores specific methods for shaping papier-mâché, practical uses in craft projects, and ways to enhance surface detail. Each approach supports varied artistic needs and project goals.
Sculpting Freehand and With Armatures
Sculpting freehand involves moulding wet papier-mâché directly by hand, allowing quick adjustments and organic shapes. This method is best for small or simple forms.
For larger or more complex designs, an armature provides a sturdy framework. Common materials include wire, cardboard, or chicken wire. The armature supports the papier-mâché layers and maintains stability as the structure dries.
Layering papier-mâché over an armature requires patience. Apply multiple thin sheets and allow full drying between layers to prevent sagging. The result is a lightweight but solid sculpture.
Making Piñatas and Decorative Objects
Piñatas are popular papier-mâché projects that combine function with decoration. Simple balloon or cardboard bases shape the form before layering paper strips dipped in glue or paste.
Decoration follows drying. Bright paints, colourful paper, and textured elements like tissue paper or feathers add visual interest. Reinforce hanging points with extra layers to support weight.
Decorative objects like bowls, masks, or animal figures also use similar base-building techniques. Adjust the number of layers according to the required strength and detail for each project.
Adding Texture and Dimension
Texture increases visual appeal and tactile interest in papier-mâché creations. Basic methods include crumpling paper for a rough finish or adding gauze for subtle surfaces.
For raised patterns, glue paper shapes or create relief with modelling paste applied over dried layers. Stencils and stamps can imprint designs before paint.
Adding dimension helps sculptures catch light and shadow, enhancing realism. Varying thickness by layering heavier paper on specific areas creates depth.
Finishing Touches and Decorative Ideas
Finishing a papier-mâché piece requires attention to surface quality and visual appeal. The final look depends on smoothing, painting, and creative additions that enhance texture and colour.
Sanding and Smoothing Surfaces
Once the papier-mâché is completely dry, sanding helps create an even surface. Use fine-grit sandpaper (around 220 grit) for gentle smoothing without damaging the layers.
Focus on eliminating bumps and edges to prepare the piece for painting. Sand in small, circular motions, frequently checking the shape to avoid over-sanding.
For smoother finishes, apply a thin layer of gesso or diluted PVA glue before sanding again. This seals the surface and fills minor imperfections, making painting simpler.
Painting and Varnishing
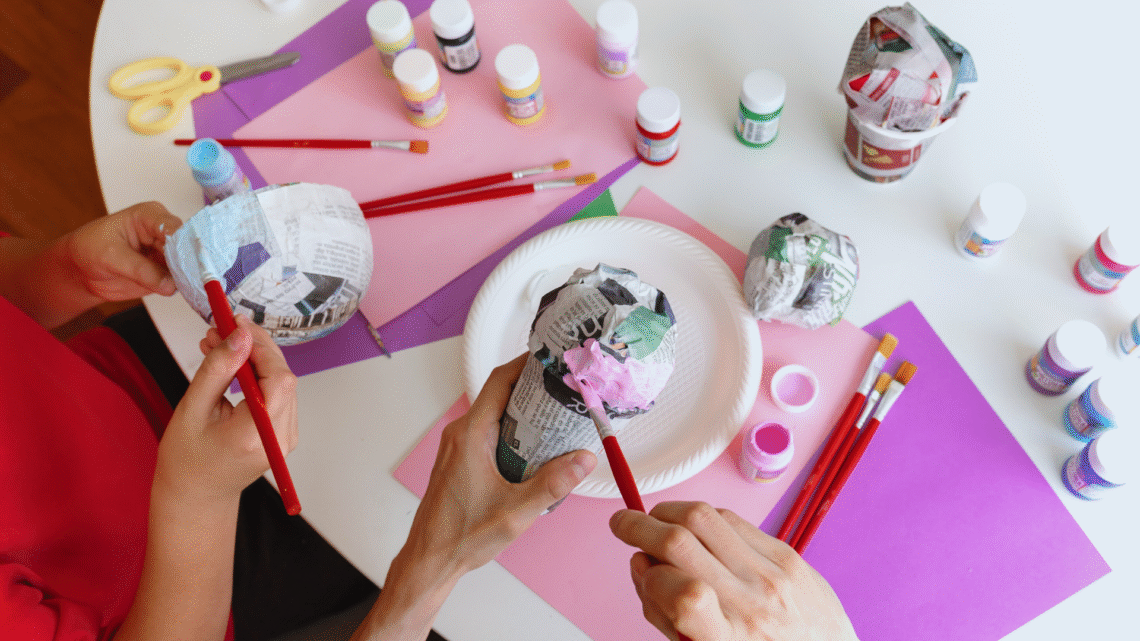
Painting papier-mâché works best with acrylic paints because they dry quickly and adhere well. Apply thin layers, allowing each coat to dry before adding the next.
Use brushes of varying sizes for details and broad coverage. Colours can be mixed to achieve specific tones or effects.
After painting, protect the surface with a clear varnish, either matte or glossy, depending on the desired finish. A water-based varnish is recommended for ease of use and less yellowing over time.
Incorporating Mixed Media
Mixed media can add depth and interest to papier-mâché art. Materials like fabric, feathers, beads, or even metal parts can be attached with glue or embedded during the layering process.
Use lightweight additions to avoid stressing the paper structure. Experimenting with different textures brings unique character and tactile variation to the final product.
Careful planning ensures harmony between the papier-mâché base and added materials, maintaining structural integrity and enhancing visual appeal.